Reverse Engineering - Introduction
Reverse engineering is the act of dismantling an object to discover it’s internal workings. It’s a very powerful tool that can help you learn how existing software works and even modify it without access to the source code.
The goal for this post is to disassemble and modify a simple application written in C.
Tools
-
- Detect-It-Easy is a tool to determine file types. This will usually tell you what language/compiler was used.
-
- An open-source x64/x32 debugger for windows.
The application
A simple application which reads a string from standard input and compares it with a hardcoded value.
#include <stdio.h>
#include <string.h>

int main(int argc, char** argv) {
    char password[32];

    printf("Password: ");
    scanf("%s", &password);

    if(strcmp(password, "secret") == 0) {
        printf("Welcome!\n");
    } else {
        printf("Wrong password!\n");
    }

    return 0;
}
Let’s compile it with minimal optimizations to make the resulting assembly easier to compare with the source code:
gcc -O0 main.cThe resulting binary is called a.exe in my case.
Gather information
Now let’s forget everything about the source code and have a look at the binary. The applications asks for a password, prints “Wrong password!” and exits with a return code of 0.
Let’s try to figure out what language/compiler was used to create the binary. Analyzing the binary using DIE shows following output:
PE64
    Linker: GNU linker ld (GNU Binutils)(2.33)[Console64,console]
PE64 - Portable Executable (64Bit), a file format used for executables on Microsoft Windows.
The second line tells us that the binary is a console application linked using GNU Binutils 2.33. Usually this means that we are dealing with a native application and decompiling is not an option.
Disassemble
Launch x64dbg and open a.exe using File -> Open.
Select the “Breakpoints” tab and double click on the <a.exe.EntryPoint> breakpoint.

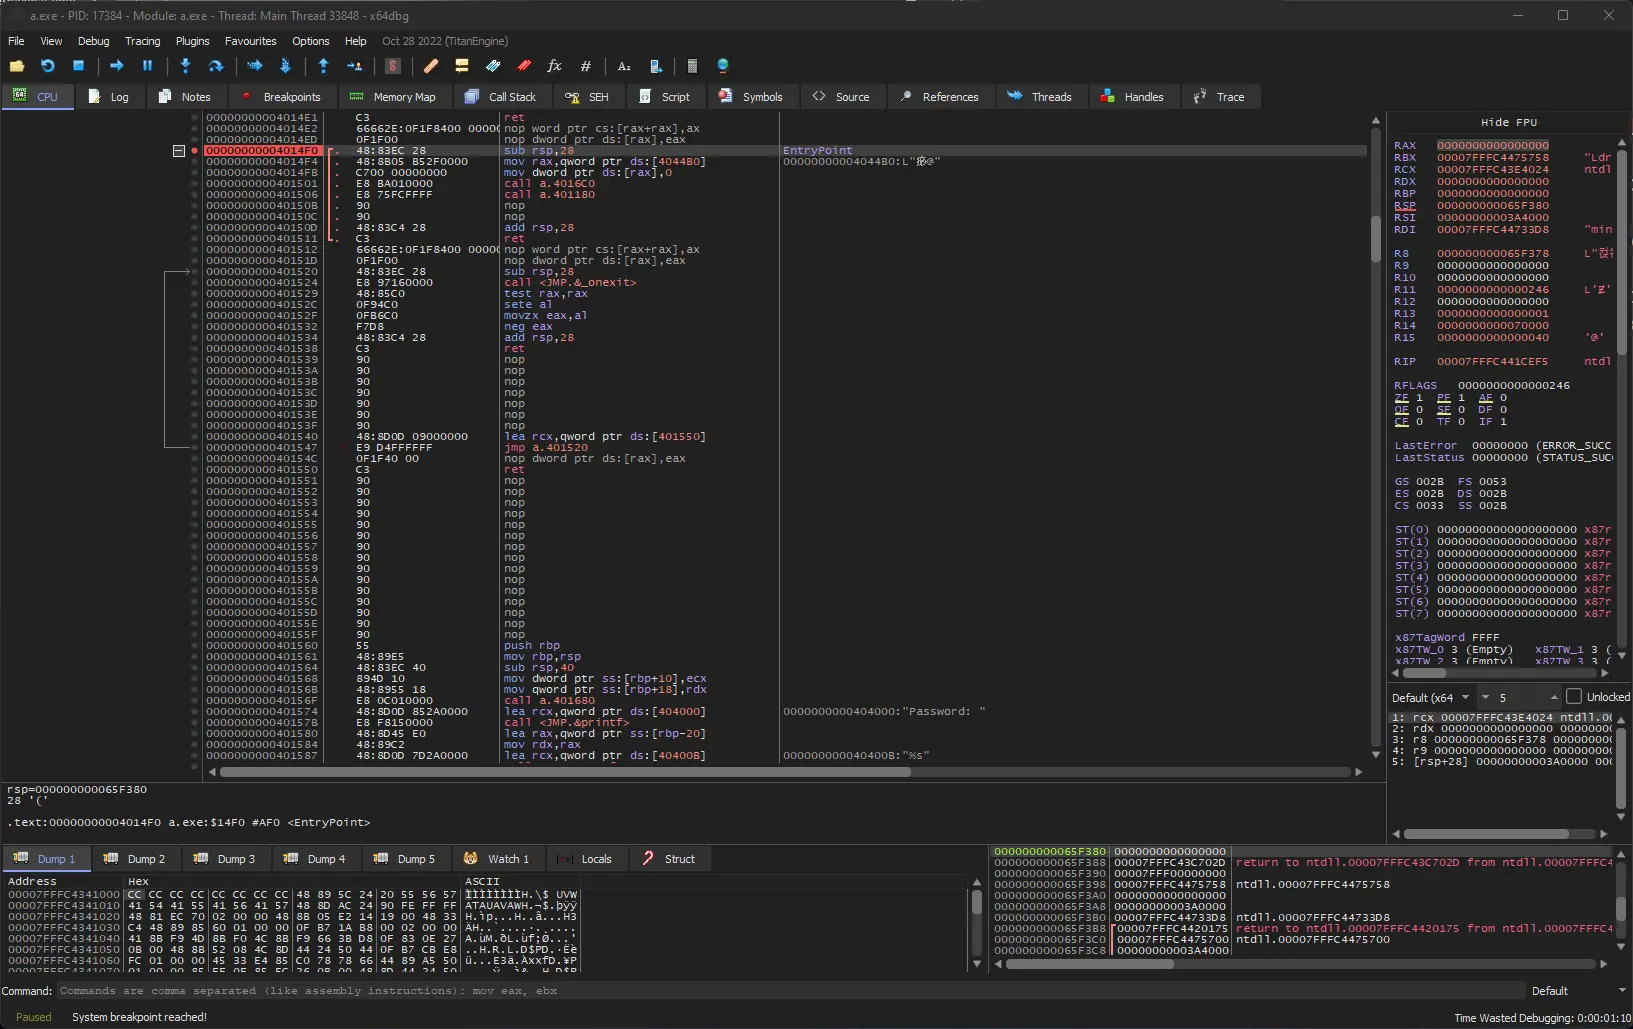
This will take you to the entry point of a.exe. Usually that’s pretty close to the main() function, and you can already see the beginning at the bottom of the screenshot.
If it’s not there or if we are looking for another piece of code searching for string references is often a quick and easy way to get there.
Right Click anywhere in the “CPU” tab -> Search For -> Current Module -> String References
Enter “password” and double click on the “Password: ” string reference.
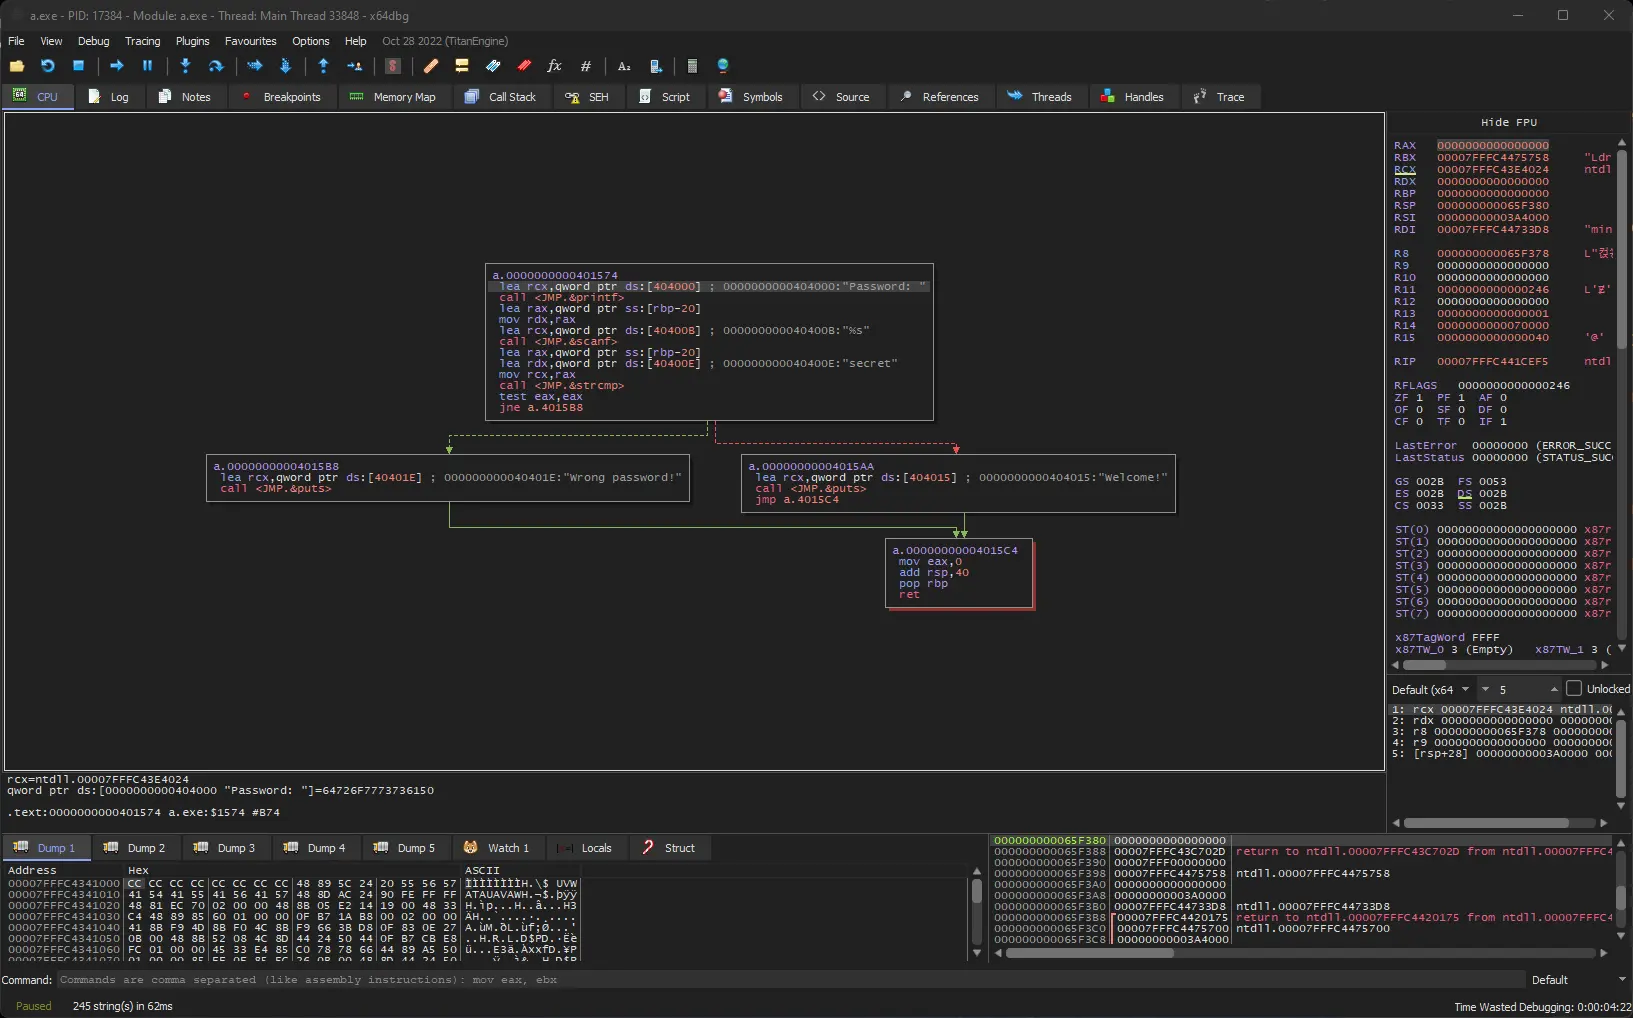
Now that we have located the main function, select any line inside of it and hit “G” to switch to Graph View to get a quick picture of the code structure.

We can clearly see how the code splits after comparing our entered password with the hardcoded string “secret” before returning 0 in either case.
Modify
Now let’s try gto modify the code so that any password is accepted. One way is to just replace the JNE (Jump if Not Equal) with a NOP (No OPeration).
Leave graph view using “G”, select the line containing the JNE instruction and hit “Space”. Make sure “Keep Size” and “fill with NOP’s” is ticked, then replace the whole instruction with “nop” and hit “Enter”.

Now go to File -> Patch File, make sure all patches are selected, press “Patch File” and enter a name for the patched file.
Now if you run the patched application any password you enter should result in “Welcome!” being displayed.
Try modifying the source code, recompile the application and see how the binary changes.